remotes::install_github("GuangchuangYu/hexSticker")package
library(hexSticker)
library(ggplot2)
library(ggdag)
다음의 패키지를 부착합니다: 'ggdag'The following object is masked from 'package:stats':
filterlibrary(magick)Linking to ImageMagick 6.9.12.3
Enabled features: cairo, fontconfig, freetype, heic, lcms, pango, raw, rsvg, webp
Disabled features: fftw, ghostscript, x11hexSticker는 R 패키지 로고를 쉽게 만들어주는 패키지이다. 육각형 패키지 로고 안에 글씨, 이미지, url 등을 넣을 수 있으며, 색, 글씨체, 글씨크기, 배경 색, 밝기 등 다양한 커스텀이 가능하다.
package logo에 넣을 graph 만들기
ggplot2 base의 그래프의 경우 별도의 이미지 저장 없이 hexSticker에서 사용이 가능하다. ggplot base가 아닐 경우 이미지로 저장한 뒤 불러와서 사용해야 한다.
ggdag()는 ggplot base인 것처럼 보이지만 hexSticker에서 ggplot base로 인식을 안하기 때문에 별도의 이미지로 저장해서 사용해야 한다.
tidy_ggdag <- dagify(
  y ~ x + z2 + w2 + w1,
  x ~ z1 + w1 + w2,
  z1 ~ w1 + v,
  z2 ~ w2 + v,
  w1 ~~ w2, # bidirected path
  exposure = "x",
  outcome = "y"
) %>%
  tidy_dagitty()

tidy_ggdag
# A DAG with 7 nodes and 12 edges
#
# Exposure: x
# Outcome: y
#
# A tibble: 13 × 8
name x y direction to xend yend circular
<chr> <dbl> <dbl> <fct> <chr> <dbl> <dbl> <lgl>
1 v -1.02 2.54 -> z1 0.368 2.23 FALSE
2 v -1.02 2.54 -> z2 -1.32 1.17 FALSE
3 w1 0.518 1.29 -> x 0.784 0.742 FALSE
4 w1 0.518 1.29 -> y -0.212 0.209 FALSE
5 w1 0.518 1.29 -> z1 0.368 2.23 FALSE
6 w1 0.518 1.29 <-> w2 -0.353 0.837 FALSE
7 w2 -0.353 0.837 -> x 0.784 0.742 FALSE
8 w2 -0.353 0.837 -> y -0.212 0.209 FALSE
9 w2 -0.353 0.837 -> z2 -1.32 1.17 FALSE
10 x 0.784 0.742 -> y -0.212 0.209 FALSE
11 z1 0.368 2.23 -> x 0.784 0.742 FALSE
12 z2 -1.32 1.17 -> y -0.212 0.209 FALSE
13 y -0.212 0.209 <NA> <NA> NA NA FALSE ggdag(tidy_ggdag) +
theme_dag()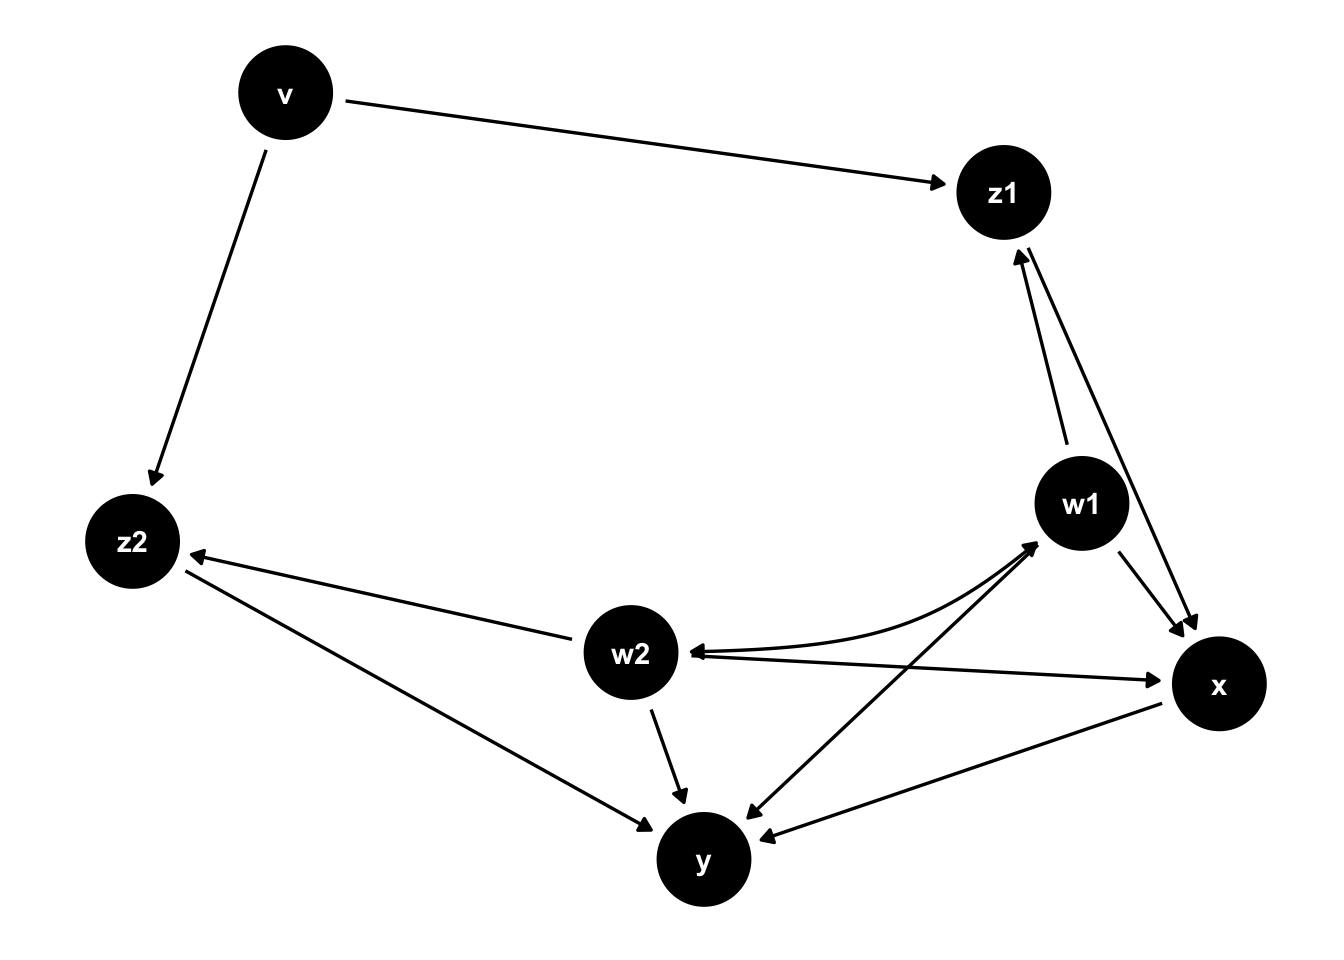
저장된 이미지를 불러올 경우 magick 패키지의 image_read()를 이용할 수 있다.
img <- image_read('Rplot.png')
img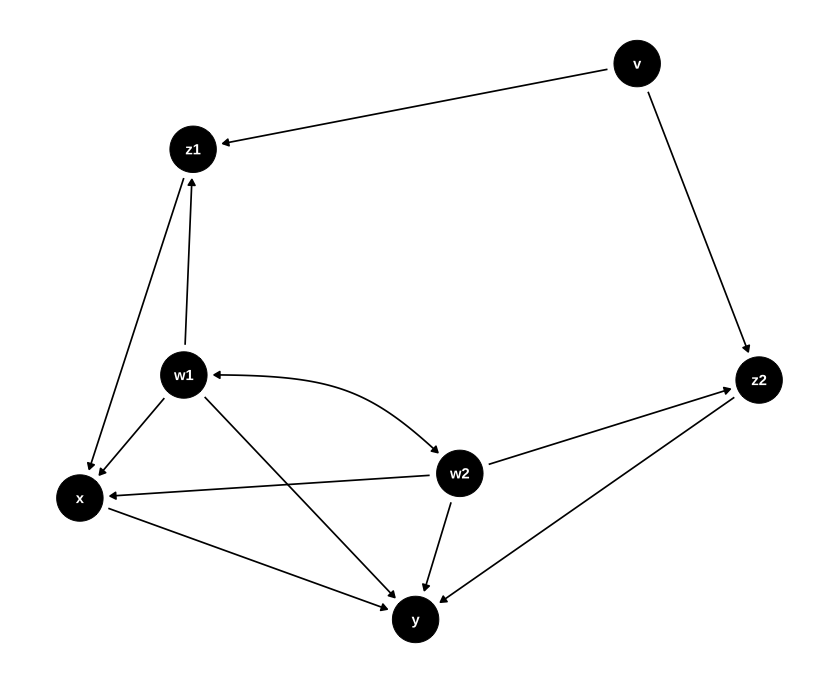
불러온 이미지는 hexSticker의 sticker() 함수를 이용하면 간단하게 패키지 로고를 만들 수 있다. 여러가지 옵션이 있는데, 기호에 맞게 커스텀해서 이용하면 된다.
sticker(subplot = img, # 저장된 image 불러오기
        package = "causal inference", # 패키지로 사용할 명칭
        s_width = 0.9, # subplot width
        s_height = 1, # subplot height
        s_x = 1, # subplot left/right position
        s_y = 0.75, # subplot up/down position
        p_size = 18, # package name font size
        h_fill = 'steelblue', #
        h_color = 'orange',
        h_size = 4, # boundary size
        url = "https://pseudolabcausalinference.tistory.com",
        u_size = 4, # url size
        spotlight = T, # spotlight 넣기
        l_y = 1, # spotlight y-position
        l_x = 1, # spotlight x-position
        l_width = 3, # spotlight width
        l_height = 3, # spotlight height
        l_alpha = 0.3, # splotlight level
        u_color = 'white'
       #filename="logo.png"
        )%>%
        print()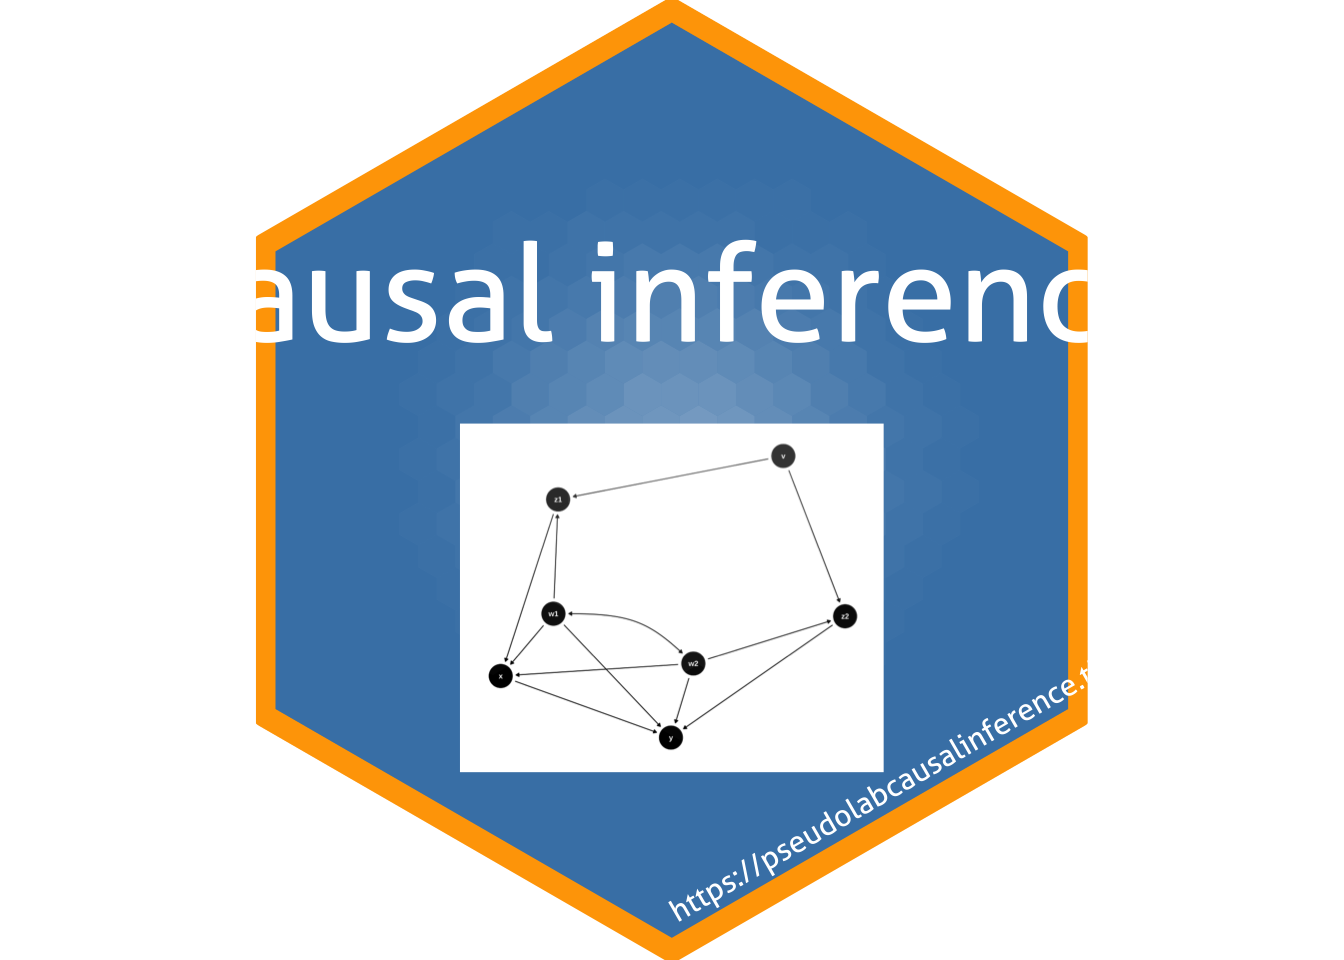
참고자료
Citation
BibTeX citation:
@online{don2022,
  author = {Don, Don and Don, Don},
  title = {hexSticker},
  date = {2022-06-24},
  url = {https://dondonkim.netlify.app/posts/2021-06-26-create-logo/hexsticker.html},
  langid = {en}
}
For attribution, please cite this work as:
Don, Don, and Don Don. 2022. “hexSticker.” June 24, 2022.
https://dondonkim.netlify.app/posts/2021-06-26-create-logo/hexsticker.html.